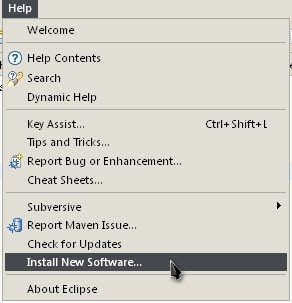
In this very quick post, I will show you how to Install the m2Eclipse plugin, and use it to create a Maven Project. I'm actually just writing this quickly to support another post. So, let's get started.
Install the m2Eclipse plugin.

Add a new software site

Enter a name, I suggest m2Eclipse
Enter the Location: http://m2eclipse.sonatype.org/sites/m2e

Click OK
Select the Site (if not already selected)
Select the Plugin and Click Next

Click Next and accept the terms until the plugin is installed.
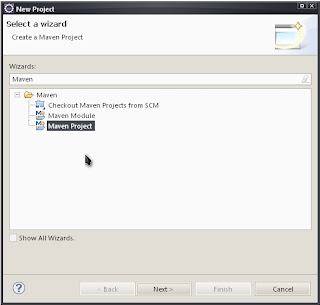
Create a Maven Project
Select "File > New > Project..."
Select "Maven Project"

Click next.
On the next screen, accept the defaults and click next.
Select the maven-acrhetype-quickstart and click next.
Enter the Group ID, Artifact ID, version and default package of your new Maven Project and click Finish.
That's it! You're done. Sorry if this seems a little rushed, I really want to talk about Weld instead.
No comments:
Post a Comment